This post may contain affiliate links. Please read our disclosure policy.
Prep Time: 20 minutes | Cook Time: 25 to 30 minutes | Freeze Time: 1 to 2 hours | Servings: 9 (using 3-inch jumbo silicone molds) | Cuisine: Fusion (Japanese-inspired) | Course: Dessert | Dietary Notes: Gluten-free, Dairy-free option available

There are some recipes I make because I want to cook something special. Then there are recipes I make because my kids are standing in the kitchen looking at me with those eyes. This is firmly in the second category. My daughters love these air fryer crispy rice ice cream sandwiches so much that the first time I made them, they were literally arguing over the last one. That is the highest compliment a recipe can receive in my house.
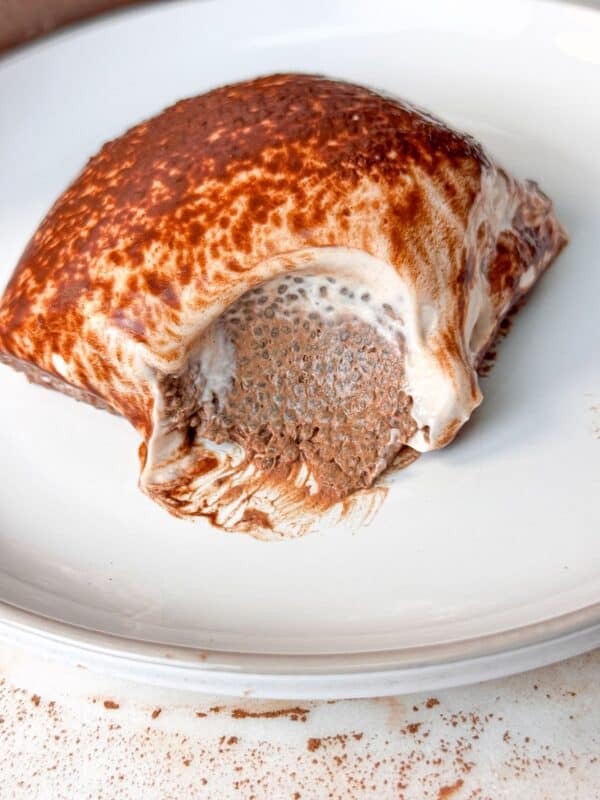
These are not your standard marshmallow Rice Krispie treat sandwiches. The base here is made from real cooked short-grain rice, lightly sweetened, pressed into disks, and air-fried until golden and crispy. Then you sandwich your favorite ice cream between two disks and freeze until firm.
I came up with the idea while thinking about mochi ice cream, that pillowy Japanese frozen treat, and rice pudding, which I have always loved. I wanted to do something in between: a crispy, satisfying shell with a creamy frozen center. The air fryer makes it quick and approachable, no deep frying or special equipment needed beyond a silicone mold.
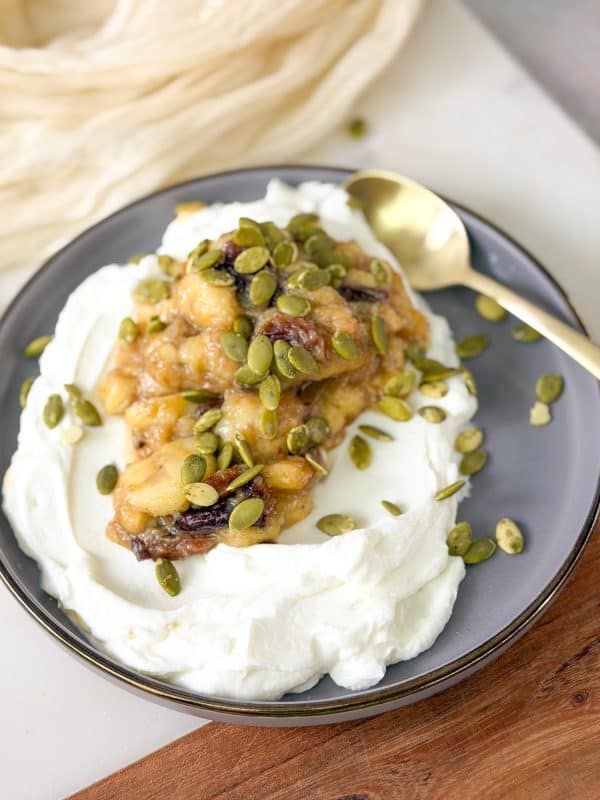
The result is a fun, filling, slightly indulgent dessert that works beautifully for an after-school treat, a weekend project with kids, or a make-ahead frozen dessert you can pull out of the freezer whenever a craving hits. The customization is endless. Drizzle them with chocolate, roll the edges in crushed peanuts, use strawberry ice cream or matcha, the rice disk is the canvas, and the fun is yours to choose. You will also love to try Viral Japanese Strawberry Cheesecake (No-Bake), Eggless Tiramisu, and Banana Cottage Cheese Pudding.
Table of Contents
- Why You’ll Love This Recipe
- What Are Air Fryer Crispy Rice Ice Cream Sandwiches?
- Ingredients
- Ingredient Notes
- Substitutions and Variations
- How to Make Air Fryer Crispy Rice Ice Cream Sandwiches
- Recipe Tips
- What to Serve with Crispy Rice Ice Cream Sandwiches
- Storage and Make-Ahead Tips
- Frequently Asked Questions
- More Delicious Desserts To Try
- Air Fryer Crispy Rice Ice Cream Sandwiches Recipe
Why You’ll Love This Recipe
- Ready in about 30 minutes of active time plus freezer time, no oven needed
- Made with real cooked short-grain rice for a satisfying, slightly chewy, crispy shell
- Naturally gluten-free and easy to make dairy-free with a non-dairy ice cream
- Endlessly customizable: any ice cream flavor, any topping, any drizzle
- Kids can help with pressing the rice disks and choosing their toppings
- Make-ahead friendly: assemble, freeze, and pull out whenever you need them
- A genuinely unique dessert that no one else at your table will have tried before

What Are Air Fryer Crispy Rice Ice Cream Sandwiches?
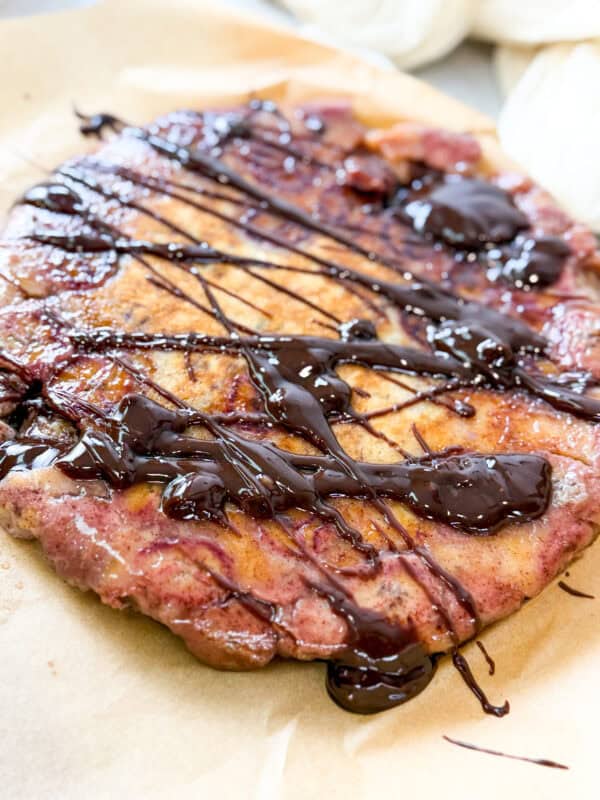
These are homemade frozen dessert sandwiches where the bread is not a cookie or a wafer but a thin, golden, crispy disk made from cooked short-grain rice. The rice is cooked until soft and sticky, mixed with a small amount of sugar and cornstarch to help it bind, pressed into flat disks, and then air fried at 375°F until the edges are golden and the surface has a satisfying crunch.
Once the disks cool and firm up, they are used as the outer shell of an ice cream sandwich. A layer of your preferred ice cream goes between two disks, and the whole thing is frozen until firm. The result is a cold, creamy, crunchy dessert that is reminiscent of mochi ice cream in concept but has its own distinct texture and character.
Mochi is a Japanese rice cake made from glutinous rice flour that is pounded into a soft, stretchy dough. Traditional mochi ice cream has a soft, chewy outer shell. This recipe takes inspiration from that idea but uses whole cooked short-grain rice instead, which air fries into a crispier, more textured disk rather than a soft one. Think of it as the crunchier, easier-to-make cousin of mochi ice cream, no special rice flour or pounding required.
The concept also draws from the tradition of crispy rice in Japanese and Asian cuisines, where short-grain or sushi rice is cooked until sticky and then crisped in oil or a dry pan to create a crunchy base for toppings. The air fryer brings that same technique home in a healthier, more accessible way.
Ingredients
For the Crispy Rice Disks
- Uncooked Calrose rice or short-grain white rice
- Water
- Granulated sugar
- Cornstarch
- Cooking oil spray
For Assembling
- Ice cream of your choice (any flavor)
Optional Toppings and Finishes
- Sesame seeds
- Crushed nuts (peanuts, almonds, or pistachios)
- Mini chocolate chips
- Melted chocolate for drizzling
- Caramel sauce for drizzling

Ingredient Notes
Calrose rice: It cooks up soft, slightly sticky, and slightly clingy, which is exactly what you need for these disks to hold together during air frying. It is the same rice widely used for sushi and Japanese rice bowls.
Cornstarch: It helps bind the rice so the disks hold their shape and don’t crumble. It also adds a slight chewiness that gives a satisfying bite.
Sugar: Lightly sweetens the rice disks and helps them brown and caramelize in the air fryer.
Cooking oil spray: Lightly spraying both the silicone molds and the surface of the rice disks before air frying is what creates the golden, crispy crust.
Ice cream: Any flavor works. Vanilla is classic, but chocolate, strawberry, caramel, matcha, or cookies and cream are great. Use dairy-free if preferred, and the recipe works the same way. Slightly soften before spreading, then refreeze once assembled.
Substitutions and Variations
Rice Substitutes: Short-grain sushi rice is the best direct substitute for Calrose, producing nearly identical results. Medium-grain rice also works well. Do not use long-grain rice (basmati, jasmine) as it lacks the starch needed to form cohesive disks.
Make It Dairy-Free: Swap in any plant-based ice cream: coconut milk ice cream, oat milk ice cream, or cashew milk varieties all work. The rice disks themselves are already dairy-free.
Flavor the Rice Disks: Add a pinch of cinnamon and a splash of vanilla extract to the warm rice for a rice pudding inspired flavor profile. A tiny amount of matcha powder mixed in creates a green tea rice disk that pairs beautifully with vanilla ice cream.
No Silicone Mold: If you do not have silicone molds, press the rice mixture onto a parchment-lined baking sheet with oiled fingers and use a round cookie cutter to cut out disks before air frying. They will not be perfectly round but the flavor and texture will be identical.
Add-In Options: Mix sesame seeds directly into the rice before pressing for a nutty flavor. Crushed freeze-dried strawberries mixed into the edges give a fruity twist. A thin layer of melted chocolate spread onto the finished disk before assembling adds a chocolate barrier layer between the rice and ice cream.
Baking Instead of Air Frying: If you do not have an air fryer, bake the rice disks on a parchment-lined tray in a 400°F oven for 15–18 minutes until golden. The result is slightly less crispy than the air fryer version, but still delicious.
How to Make Air Fryer Crispy Rice Ice Cream Sandwiches
Step 1: Cook the Rice
Add Calrose rice and 1½ cups of water to a small pot. Bring to a boil over medium-high heat, then reduce the heat to low, cover, and cook for 15 minutes. Turn off the heat and let the rice steam, covered, for another 10 minutes until soft and slightly sticky.
Step 2: Season the Rice
While the rice is still warm, add 2 tablespoons of sugar and 1 tablespoon of cornstarch. Stir well to combine and lightly mash with a spoon until the rice becomes slightly sticky but still textured.
Step 3: Press into Disks
Lightly spray the silicone cups or parchment squares with cooking oil. Add 2–3 tablespoons of the warm rice mixture into each mold, then press firmly and evenly with the back of a spoon or your oiled fingers to form thin disks about a quarter-inch thick.
Press firmly enough that the disk holds together when you release it, but do not pack so hard that it becomes completely dense.
Step 4: Air Fry the Disks
Place the disks in the air fryer basket in a single layer. Cook at 375°F for 10–12 minutes until the surfaces are golden and the edges start to look crispy. Remove from the air fryer and let cool on a flat surface for about 10 minutes so they firm up.
Step 5: Prepare the Ice Cream Layer
Take your ice cream out of the freezer and let it soften on the counter for 5 to 10 minutes. You have two options for portioning it.
Spread the softened ice cream about ¾ inch thick in a parchment-lined flat container and refreeze for 1–2 hours until firm, then cut into pieces that match the size of the rice disks.
Another option is to scoop about 2 tablespoons of softened ice cream directly onto a rice disk. Both methods work well.
Step 6: Assemble the Sandwiches
Place one cooled and firm rice disk flat on a clean surface. Add your ice cream portion in the center. Place a second rice disk on top and press down gently but firmly enough to make the ice cream spread to the edges.
Step 7: Freeze Until Firm
Place the assembled sandwiches on a parchment-lined tray and freeze for 30–45 minutes until the ice cream inside is firm again and the whole sandwich holds together when picked up.
Step 8: Add Toppings and Serve
Once frozen and firm, drizzle with melted chocolate or caramel, roll the edges in sesame seeds, crushed nuts, or mini chocolate chips, or serve plain.
Let the sandwiches sit at room temperature for about 5 minutes before eating so the rice disks soften slightly and become easier to bite through.

Recipe Tips
The rice is everything. Do not try this recipe with long-grain rice. It must be short-grain, sticky rice like Calrose or sushi rice. That starch content is what holds the disks together and gives them their satisfying texture once air-fried.
Do not over-crisp the rice disks. This is the most common mistake. If the disks cook too long and become rock hard, they will be impossible to bite through once frozen. You want golden and crispy, not dark and brittle. Start checking at the 10-minute mark.
Chill the rice mixture before pressing if it becomes too sticky to handle. A few minutes in the fridge will make it easier to press into the molds cleanly.
Soften the ice cream just enough but not too much. You want it soft enough to spread or scoop easily but not so melted that it runs out the sides. Five to ten minutes out of the freezer is usually perfect.
Let them sit before you eat them. When you take the sandwiches out of the freezer, keep them on the counter for 5 minutes before biting in. The rice disks need just a little time to soften slightly so they are crispy but not hard. Going straight from frozen to bite is going to be tough on your teeth.
What to Serve with Crispy Rice Ice Cream Sandwiches
These crispy rice ice cream sandwiches are a complete dessert on their own. If you are building a dessert table or want to offer a spread, here are some ideas that complement them beautifully:
- A drizzle bar: set out melted chocolate, caramel sauce, and honey alongside crushed pistachios, sesame seeds, and mini chocolate chips so everyone can customize their own
- Fresh fruit on the side: sliced mango, strawberries, or raspberries add brightness and freshness next to the rich, creamy sandwich
- A warm drink alongside for contrast: hot tea, warm milk, or coffee pairs surprisingly well with this cold dessert
- Mini chocolate chip cookies or brownies if you want to build out a full kids’ dessert plate
- A scoop of extra ice cream on the side for those who want more, and there will always be someone!

Storage and Make-Ahead Tips
Freezer Storage: Wrap each sandwich in parchment paper, then in aluminum foil, and store in a sealed zip-lock bag or airtight container. This prevents freezer burn and keeps them fresh for up to 2 months.
Storing Rice Disks: If you want to make the disks ahead of time without assembling the full sandwich, store the cooled air-fried disks in an airtight container at room temperature for up to 2 days, or in the fridge for up to 5 days. They will lose some crispiness in the fridge, but will still work well once assembled and refrozen.
Serving from Frozen: Don’t eat these sandwiches straight from the freezer. Let them sit at room temperature for about 5 minutes before eating. This softens the rice disks slightly, making them easier to bite and nicely crisp instead of hard.
Refreezing: If the ice cream inside starts to melt during the topping stage, just place the sandwich back in the freezer for 15–20 minutes until firm again.
Frequently Asked Questions
Calrose is a short- to medium-grain rice that is soft and slightly sticky, which is exactly what you need for the rice disks to hold together. You can substitute it with sushi rice or any short-grain rice. Avoid using long-grain rice like basmati or jasmine, as it won’t bind well.
There are two likely causes. You likely used long-grain rice or didn’t press the disks firmly enough in the mold. Make sure you use short-grain rice, press tightly, and shape while the rice is still warm, since it’s far easier to compact than cold rice.
Look for a golden, lightly browned surface and edges that appear dry and set rather than wet or translucent. They’ll firm up as they cool. Avoid overcooking, as they can become too hard to eat comfortably once frozen.
Yes. Bake the rice disks on a parchment-lined baking sheet in an oven preheated to 400°F for 15–18 minutes, flipping halfway until golden. They’ll be slightly less crispy but still very good.
No. Rice Krispie versions use puffed cereal with marshmallows for a soft, chewy texture. This recipe uses pressed, cooked short-grain rice that’s air-fried until crispy, with a more subtle flavor and no marshmallows; it’s closer to mochi ice cream.
More Delicious Desserts To Try


Air Fryer Crispy Rice Ice Cream Sandwiches
Ingredients
For the Crispy Rice Disks
- 1 cup Uncooked Calrose rice, or short-grain white rice
- 1½ cups Water
- 2 tablespoons Granulated sugar
- 1 tablespoon Cornstarch
- Cooking oil spray
For Assembling
- Ice cream of your choice
Optional Toppings and Finishes
- Sesame seeds
- Crushed nuts, peanuts, almonds,or pistachios
- Mini chocolate chips
- Melted chocolate, for drizzling
- Caramel sauce, for drizzling
Instructions
- Add rice and 1½ cups of water to a small pot. Bring to a boil, reduce the heat to low, cover, and cook for 15 minutes. Turn off the heat and let it steam, covered, for 10 minutes until soft and slightly sticky.
- While the rice is still warm, mix in 2 tablespoons of sugar and 1 tablespoon of cornstarch. Lightly mash with a spoon until the rice becomes slightly sticky but still textured.
- Lightly spray silicone cups or parchment squares with oil. Add 2–3 tablespoons rice and press firmly with the back of a spoon or oiled fingers to form thin disks.
- Place the disks in the air fryer and cook at 375°F for 10–12 minutes, until golden and crispy. Let cool for about 10 minutes so they firm up.
- Spread softened ice cream about ¾ inch thick in a parchment-lined container and freeze until firm, about 1–2 hours, then cut into pieces to match the rice disks. Another option is scooping about 2 tablespoons of ice cream per sandwich.
- Place ice cream between two crispy rice disks and press gently.
- Freeze the assembled sandwiches for 30–45 minutes until firm.
- Drizzle with chocolate or roll the edges in sesame seeds, crushed nuts, or mini chocolate chips if desired.
Notes
- The rice is everything. Do not try this recipe with long-grain rice. It must be short-grain, sticky rice like Calrose or sushi rice. That starch content is what holds the disks together and gives them their satisfying texture once air-fried.
- Do not over-crisp the rice disks. This is the most common mistake. If the disks cook too long and become rock hard, they will be impossible to bite through once frozen. You want golden and crispy, not dark and brittle. Start checking at the 10-minute mark.
- Chill the rice mixture before pressing if it becomes too sticky to handle. A few minutes in the fridge will make it easier to press into the molds cleanly.
- Soften the ice cream just enough, but not too much. You want it soft enough to spread or scoop easily, but not so melted that it runs out the sides. Five to ten minutes out of the freezer is usually perfect.
- Let them sit before you eat them. When you take the sandwiches out of the freezer, keep them on the counter for 5 minutes before biting in. The rice disks need just a little time to soften slightly so they are crispy but not hard. Going straight from frozen to bite is going to be tough on your teeth.