This post may contain affiliate links. Please read our disclosure policy.
Say hello to Meal Prep Series 1 — the very first in a lineup of easy, tasty recipes to make your week run a whole lot smoother. In this roundup, you’ll find 9 different recipes you can prep ahead, from comfort-food favorites like Instant Pot Roast and Creamy Mashed Potatoes to lighter bites like Tuna Dill Salad and Quick-Steamed Broccoli. There are also a few fun extras, like Whipped Hummus, Chia Jam, and even waffles with strawberries (yes, meal prep can be sweet too!).
Whether you’re stocking up for family dinners, grabbing quick lunches, or just wanting a few ready-to-go snacks in the fridge, this mix-and-match lineup has you covered. Think of it as your no-stress guide to meal prep that actually feels doable — and not boring. And don’t worry, this is just the beginning! More recipe collections are on the way, each with fresh recipes to keep your weekly prep exciting.
Table of Contents
I’m thrilled to launch this meal prep series and can’t wait to share it with you! Meal prep has completely changed the way I approach cooking during the week. Instead of stressing over what to make every day, I love having a fridge full of ready-to-go meals and ingredients that make life so much easier.
In this series, we’ll cover everything from simple prep basics to creative recipes that keep things exciting, all while saving you time, money, and energy. Whether you’re new to meal prep or already a fan looking for fresh ideas, this series will give you plenty of inspiration to make your weekly cooking routine smoother and more enjoyable.
Why Meal Prep?
Saves Time During the Week: Instead of cooking from scratch every day, you batch-cook once or twice and simply reheat or assemble meals. This cuts down on last-minute scrambling and frees up weekday time.
Reduces Stress and Decision Fatigue: Knowing your meals are ready takes away the “what should I eat?” question that can feel overwhelming after a long day.
Helps You Eat Healthier: With prepped meals, you’re less likely to grab fast food or packaged snacks. You control the ingredients, portion sizes, and cooking methods.
Saves Money: Buying ingredients in bulk and cooking at home is significantly cheaper than eating out. Plus, it reduces food waste since you’re planning meals around what you’ve already prepped.
Supports Fitness & Nutrition Goals: If you’re tracking macros, following a specific diet (low carb, high protein, gluten free, etc.), or just want balanced meals, prepping in advance makes it easy to stay consistent.
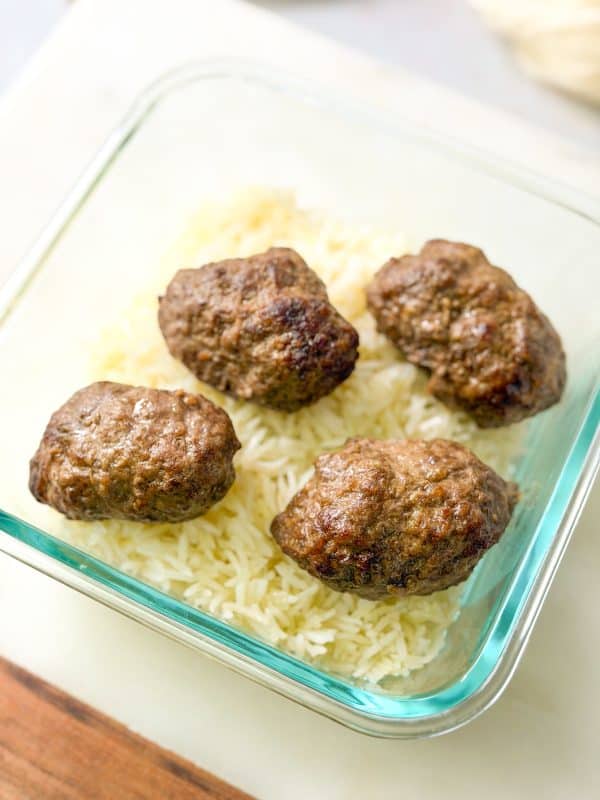
Instant Pot Roast Beef
If you’re looking for a hearty, comforting dinner that practically cooks itself, this Instant Pot Beef Roast is the recipe you need—perfect for meal prep and planning ahead for the week. Honestly, this is one of the easiest meals I make! But when you serve it, everything from the flavor to the tenderness and juiciness will make it look like you spent hours in the kitchen. I also make it using the slow-cooked method, but from experience, my favorite roast beef always comes out best with the Instant Pot.
The meat turns out tender, juicy, and infused with warm spices, perfectly cooked vegetables, and a rich, flavorful broth. This beef roast recipe is a showstopper—perfect for a weeknight dinner or even a special holiday gathering.
I love prepping the roast ahead of time. Season it the night before, chop the vegetables, and the next day it practically cooks itself! Leftovers store beautifully in the fridge or freezer, making it a perfect option for meal prep lunches or dinners throughout the week.
This recipe is also incredibly versatile. You can add potatoes, carrots, or parsnips right in the pot, or toss in a few sprigs of rosemary or a splash of red wine to elevate the flavor. Serve it with creamy mashed potatoes, roasted vegetables, or a side of rice. Don’t forget to drizzle some of the flavorful broth over the top—it takes the dish to the next level.
My family loves this recipe so much that it has become a go-to weeknight dinner. My kids fight over the leftovers (and honestly, I don’t mind!) and my husband even takes it for lunch. Whether you’re cooking for one, a busy family, or prepping for the week, this easy Instant Pot roast beef is a guaranteed hit.

Instant Pot Roast Beef
Ingredients
- 6 lb Roast beef
- 6 tablespoons Olive oil (or avocado oil), divided
- 1 tablespoon White pepper
- 1 tablespoon 7‑Spice mix, (or substitute Allspice)
- 1 tablespoon Garlic powder
- 1 tablespoon Paprika
- 1 teaspoon Black pepper
- 1 tablespoon Salt
- 3 Bouillon cubes , optional
- 2 Cinnamon sticks, small
- 5-6 Cloves, whole
- 2 Anise Stars
Instructions
- Pat the roast dry with paper towels. Rub 2–3 tablespoons of oil all over the roast to help the spices stick. Rub all the spices evenly over the oiled roast.
- Turn the Instant Pot to Sauté/Sear mode. Add 1–2 tablespoons of oil. When hot, sear the roast on all sides until browned (3–5 minutes per side). Remove the roast and set it aside.
- Add onions (and some carrots if desired) to the pot. Sauté 2–3 minutes until softened. Add cinnamon sticks, cloves, and anise stars. Stir briefly to release aroma. Pour in 1 cup of water or broth to deglaze, scraping up browned bits.
- Return the roast to the pot. Add remaining carrots and potatoes around the roast. Pour in remaining water (or broth) and add bouillon cubes if using.
- Close the lid and seal the valve. Set to High Pressure for 2½ hours (150minutes). After that, allow the pressure to release naturally for 15–20minutes, then carefully quick-release any remaining pressure.
- Using tongs, remove the roast and place it neatly on a serving dish. Drizzle some broth over the meat for juiciness. Arrange cooked vegetables around the roast for serving.
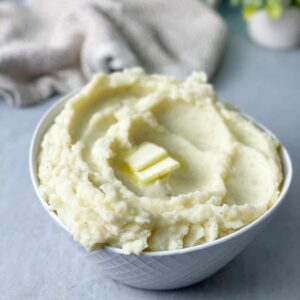
Creamy Mashed Potatoes
Mashed potatoes are a recipe everyone needs to know how to make, but you’ve got to make them right—fluffy, creamy, and full of flavor. They go with so many meals and are perfect for easy meal prep to pair with veggies and protein.
Nothing says comfort like a bowl of classic mashed potatoes. With a little secret ingredient, this recipe gives you the fluffiest, smoothest mashed potatoes, with rich flavor from heavy cream, butter, and a touch of cream cheese. After boiling the potatoes, it only takes a few minutes to mash them into this bowl of goodness. Bonus: these mashed potatoes recipe leftovers last for days, so you can enjoy them all week with proteins like roast beef, chicken, salmon, or even shrimp—plus your favorite vegetables on the side.
Meal prepping mashed potatoes is a total game-changer for busy weeks! Start by making a big batch using your favorite recipe, then divide it into airtight glass containers, these are perfect because they’re durable, microwave-safe, and won’t absorb odors or stains. For portioning, consider individual servings if you want grab-and-go lunches, or larger containers for family meals.
To reheat, simply microwave them covered for a few minutes, stirring halfway to keep them creamy and smooth, or reheat gently on the stove with a splash of milk or cream. Freshly made mashed potatoes will last about 3–4 days in the fridge, making them perfect for weekday meals.
They can also be frozen for longer storage—just portion into freezer-safe containers or bags, and thaw in the fridge overnight before reheating. For variety, you can top them with roasted vegetables, shredded cheese, or fresh herbs each day to keep lunches exciting while staying simple and convenient.
Creamy Mashed Potatoes
Ingredients
- 8 large potatoes, peeled
- 1 cup Heavy cream
- ½ stick Unsalted butter
- 4 ounces Cream cheese
- 1 teaspoon Salt, to taste
- ⅛ teaspoon Black pepper
Instructions
- Peel the potatoes and cut them in half. Place them in a large pot and cover with cold water. Add half of the salt to the water.
- Bring the water to a boil over high heat, then reduce the heat to medium and cover. Cook until the potatoes are tender, about 15 – 20 minutes.
- While the potatoes cook, return the empty pot to medium-low heat. Add the heavy cream, butter, and cream cheese. Stir consistently until the mixture is smooth and warmed through.
- Drain the cooked potatoes and return them to the pot with the cream mixture.
- Mash the potatoes using a potato masher or hand mixer until smooth, fluffy, and fully combined with the cream mixture.
- Taste and adjust with the remaining salt and black pepper. Serve warm.
Ultra Creamy Whipped Hummus
Make Ultra Creamy Whipped Hummus in just 5 minutes — even using canned chickpeas! My secret ingredient and simple blending trick transform ordinary, grainy hummus into a restaurant-quality dip that’s light, airy, and unbelievably smooth. Vegan, dairy-free, and ideal for meal prep or parties, this homemade hummus is about to become your new go-to recipe.
I’ve made countless hummus variations over the years — from classic Lebanese-style hummus to vibrant roasted red pepper versions — but nothing compares to this ultra creamy, whipped hummus. Once I discovered the magic of blending cold water and ice cubes, everything changed. The texture became so smooth and fluffy, almost like a savory mousse.
I started making this version when I realized how much store-bought hummus lacked that whipped, cloud-like consistency you get at restaurants. Now, I make it fresh every week — it’s quick, budget-friendly, and keeps beautifully in the fridge for days. That’s why it’s perfect for meal prep: it adds a burst of creamy flavor and plant-based protein to wraps, sandwiches, grain bowls, or snack plates. Having a jar of homemade hummus ready to go makes healthy eating so much easier (and so much tastier!).

Ultra Creamy Whipped Hummus
Ingredients
- 2 cans (15.5 oz) Chickpeas, drained
- ¾ cup Water, (secret ingredient for ultra smooth texture)
- ¾ cup Tahini
- 2-3 Garlic cloves
- ¼ Lemon, freshly squeezed
- 3 cubes Ice, (helps create a whipped, airy texture)
- 1 teaspoon Salt
Optional Alternatives
- ▢Instead of canned chickpeas, you can use boiled or pressure-cooked chickpeas (see Notes section below).
Garnish
- ▢2 tablespoons Fresh Parsley
- ▢pinch of Cayenne Pepper or Paprika
- ▢drizzle of olive oil
Instructions
- Add ¾ cup cold water to your high-speed blender or food processor first.(Adding liquid first helps the blades move freely for a smoother blend.)
- Add the drained chickpeas directly on top of the water.
- Pour in lemon juice, tahini, olive oil, garlic, salt, and ice cubes.
- Blend on high speed until the mixture becomes silky smooth and fluffy.This usually takes 1–2 minutes, depending on your blender.
- Stop the blender halfway through to scrape down the edges and move the mixture around with a spatula.This ensures everything blends evenly and prevents the blades from getting stuck.
- If you like your hummus thinner, add 1 teaspoon of cold water at a time and blend again. (For this recipe, the given amount should be perfect.)
- Add more salt or lemon juice if needed. Serve and enjoy!
High Protein Tuna Dill Salad
If you really want to stay full and enjoy a delicious meal, this high-protein tuna salad is it! I encourage anyone who is crunched for time, like I am, to prepare this healthy tuna salad ahead of time in the fridge, ready to eat. My kids absolutely LOVE my tuna dill salad and grab it whenever they’re hungry, which is amazing since it saves me so much time. My husband takes some to work as well, which also saves time and helps us stay on track since tuna protein is super filling. This tuna salad recipe is truly special.
Creamy, crunchy, and loaded with protein, this High-Protein Tuna Salad hits the spot. Packed with tuna, hard-boiled eggs, crisp vegetables, and a light Greek yogurt–avocado mayo dressing, it’s hearty, satisfying, and perfect for meal prep or a quick, wholesome lunch.
Meal prepping this Tuna Egg White Dill Salad is super easy and a total time saver for busy weeks. Start by making a big batch and storing it in airtight glass containers, they keep the salad fresh, prevent odors, and are dishwasher safe. You can portion it into individual servings for grab-and-go lunches or keep it in a larger container for family meals.
The salad will last about 3–4 days in the fridge, making it perfect for quick weekday meals. Since it’s already cold and ready to eat, no reheating is necessary, which makes it super convenient. If you want to prep even further ahead, you can freeze the tuna mixture before adding fresh veggies and herbs, just thaw overnight in the fridge and stir in your toppings before serving. Pair it with leafy greens, whole-grain crackers, or toast for a complete and protein-packed meal that keeps you full and satisfied.

High Protein Tuna Dill Salad
Ingredients
- 4 cans Albacore tuna in water, drained
- 5 Eggs, boiled and cubed
- 8 stalks Celery, diced
- ½ cup Dill pickles, cubed
- 2 teaspoons Fresh dill, chopped (or 1 teaspoon dried)
- 1 cup Greek yogurt or Mayonnaise , or a mix of both
- ¼ cup Olive oil
- 3 tablespoons White Vinegar
- 1 Lemon juice
- 1½ teaspoon Smoked paprika
- ½ teaspoon Black pepper, Freshly Cracked
- Salt, to taste
Optional Ingredients
- ½ cup Onions, finely diced
- 1 Red bell pepper, diced
Instructions
- Boil until hard-cooked, then peel and cube.
- In a large bowl, whisk together Greek yogurt (or mayonnaise), olive oil, vinegar, lemon juice, smoked paprika, salt, and pepper until smooth and creamy.
- Stir in tuna and eggs until fully coated.
- Fold in celery, pickles, dill, and any optional veggies.
- Refrigerate for 30 minutes to let flavors meld before serving.
Flash Steamed Broccoli
This Perfectly Boiled and Seasoned Broccoli is seriously unreal!! It is crispy, flavorful, and nothing like those soggy, bland broccoli florets you’ve probably had before. I love making a big batch at the start of the week because it keeps perfectly in the fridge for 3–4 days, which is awesome for meal prep.
I just store it in an airtight container, and it’s ready to grab whenever I need a quick, healthy side. You can eat it cold in salads, toss it with a little olive oil and lemon for lunch, or reheat it gently on the stove or in the microwave, it tastes amazing every time and I especially love it warm. Honestly, the flavor is so good it almost feels indulgent, and it goes with pretty much everything like chicken, salmon, tofu, you name it.
Once you try it, you’ll totally understand why I make this broccoli every single week, it’s that good! My friends kids don’t eat veggies and they slammed some when they were over, haha!

Flash Steamed Broccoli
Ingredients
- 6 cups Broccoli florets
- 3 tablespoons Olive oil
- Water
- Salt, to taste
- Black pepper, to taste
Instructions
- First, Fill a medium pot with water half way. Bring the water to a boil then drop in the broccoli florets.
- Next, boil for 3 minutes then strain
- Finally, drizzle olive oil, salt and black pepper all over the boiled broccoli and toss around to evenly coat.
- Enjoy warm alone or with rice and protein.
High Protein Mocha Chia Pudding Cake
This dessert looks like cake, but it’s actually a luscious creamy mocha chia pudding. Think rich chocolate flavor, a hint of coffee, and that velvety texture you can either slice or scoop.
This recipe is seriously amazing!!! You guys, it’s so creamy and rich it almost feels guilty to eat, but the best part? It’s made with better-for-you ingredients, so you can enjoy every bite without the guilt.
The texture is super smooth and luxurious, like something you’d get at a fancy restaurant, but way easier to make at home. It’s also super filling thanks to the protein and healthy fats, which makes it perfect for meal prep or a quick, satisfying snack anytime during the week. I love making a big batch and storing it in airtight glass containers in the fridge—it keeps beautifully for at least 3–4 days.
You can enjoy it cold, straight out of the fridge, or let it sit at room temperature for a few minutes if you want it a little softer. Every spoonful is indulgent and decadent, but knowing it’s packed with good-for-you ingredients makes it feel like a little everyday luxury you can actually feel good about.
Honestly, this Mocha Chia Pudding is one of those desserts that’s rich, creamy, and downright addictive—and it works perfectly for prepping ahead so you always have something sweet and satisfying ready to go.

High Protein Mocha Chia Pudding Cake
Ingredients
Chia Pudding Base
- 2 cups Greek yogurt
- ¼ cup Cacao powder
- 1 cup Chia seeds
- ¼ cup Honey, or maple syrup
- ½ teaspoon Vanilla extract
- ¼ cup Brewed coffee, cooled
- 1 cup Almond milk, or milk of choice
- Pinch of sea salt
Yogurt Frosting
- 1 cup Greek yogurt
- 1 teaspoon Cacao powder
- 1 tablespoon Brewed coffee, cooled, optional
- ¼ teaspoon Vanilla extract
- 4 tablespoons Honey, or maple syrup
Instructions
Make the Pudding Base
- In an 8×8-inch Pyrex dish, add Greek yogurt, cacao powder, honey, vanilla extract, and sea salt. Mix until smooth and chocolatey, like a pudding.
- Stir in the chia seeds, brewed coffee, and almond milk until evenly combined.
Prepare the Yogurt Frosting
- In a separate bowl, mix Greek yogurt, cacao powder, brewed coffee, vanilla extract and honey until smooth and creamy.
- Refrigerate both the chia pudding base and the yogurt frosting for at least 2–4 hours, or overnight, to allow them to set.
Assemble the Cake
- Once set, spread the Yogurt frosting evenly over the chia pudding layer.
- Generously dust the top with extra cacao powder.
Serve and Enjoy
- Slice into squares for a cake presentation or scoop into bowls for a pudding-style snack. Enjoy!
10-Minute Strawberry Chia Jam
This homemade strawberry chia jam is a quick, wholesome alternative to traditional jam. Made with just a handful of ingredients and ready in about 10 minutes, it’s naturally thickened with chia seeds and lightly sweetened with honey or maple syrup.
I started making this jam when I wanted something fresh, fruity, and less sugary than store-bought versions. It’s amazing how just a few simple ingredients can turn into something so delicious. Once I realized how easy it was, I stopped buying jars from the store altogether! I love spreading it on toast, swirling it into yogurt, or spooning it over pancakes for a burst of natural strawberry flavor.
This jam has also become one of my favorite meal prep essentials. It keeps well in the fridge for several days, so I like to make a batch over the weekend and use it throughout the week. Having a jar of homemade strawberry chia jam ready to go makes breakfasts and snacks so much easier — and it feels great knowing it’s made from real, wholesome ingredients without any preservatives.
If you’re into meal prep like I am, this recipe will quickly become a go-to for your fridge. Pair it with your favorite overnight oats, Greek yogurt parfait, or even peanut butter sandwiches for a quick, nutritious boost any time of day.

10-Minute Strawberry Chia Jam
Ingredients
- 2 cups Fresh or frozen strawberries
- ¾ cup Water
- 3 tablespoons Chia seeds
- 2 tablespoons Honey, maple syrup, or other sweetener (optional, to taste)
- ½ teaspoon Lemon juice, optional
Instructions
- Rinse fresh strawberries under cold water, pat them dry, and remove the green stems (hull them).If using frozen, no need to thaw first; they’ll soften as they cook.
- Place the strawberries in a small saucepan over medium heat. Cook for about 5–7 minutes, stirring occasionally, until the berries begin to soften and release their juices.
- Mash the strawberries with a fork or potato masher to your desired texture. Leave some chunks for a rustic jam or mash until smooth.
- Stir in the chia seeds, lemon juice, and sweetener if using. Continue cooking for 5 minutes or so, stirring often, until everything is well combined.
- Remove the saucepan from the heat and let the mixture sit for 5–10 minutes. The chia seeds will absorb liquid and thicken the jam as it cools.
- Once cooled, transfer to a clean jar or airtight container. The jam will continue to set as it rests.
- Store in the refrigerator for up to 1 week.
Pumpkin Spice High Protein Waffles
Pumpkin Spice High Protein Waffles are the perfect cozy breakfast to celebrate the flavors of fall while staying nutritious and satisfied. Made with Greek yogurt, almond flour, and warm pumpkin pie spices, these waffles are fluffy on the inside and golden crisp on the outside.
They’re naturally gluten-free, high in protein, and lightly sweetened with coconut sugar, making them a healthier choice compared to traditional waffles without sacrificing flavor.
What makes these waffles even better is how well they work for meal prep. You can easily make a batch on the weekend, let them cool, and store them in the fridge or freezer for later. In the morning, just pop one in the toaster or oven, and you’ll have a warm, homemade breakfast in minutes — no mixing, no mess, and no rushing around. It’s one of those recipes that saves time while still making you feel like you’re eating something special.
I love having these waffles on hand during busy weeks. They keep their texture beautifully after freezing, and the cozy pumpkin spice aroma fills the kitchen every time I reheat them. Pair them with a little Greek yogurt, nut butter, or a drizzle of maple syrup for a satisfying breakfast that tastes just as good as the day you made them.
Whether you enjoy them on a crisp autumn morning with a drizzle of maple syrup, meal prep a batch to freeze for busy weekdays, or serve them at a festive brunch, these waffles bring comfort, convenience, and nutrition to every bite.

Pumpkin Spice High Protein Waffles
Ingredients 1x2x3x
- 2 cups Blanched almond flour, superfine works best
- 3 tablespoons Coconut sugar, or regular sugar, adjust to taste
- 1 teaspoon Baking powder
- ½ teaspoon Baking soda
- ¼ teaspoon Salt
- 3 Large eggs
- 1 cup Plain Greek yogurt, full-fat works best
- ¼ cup Milk, or almond milk
- ¼ cup Coconut oil, melted or butter, melted
- 2 teaspoons Pumpkin pie spice
- 2 teaspoons Pure vanilla extract
- ½–1 teaspoon Cinnamon, optional, for a warmer flavor
Greek Yogurt Icing, Optional
- ▢½ cup Greek yogurt
- ▢1 tablespoon Honey
- ▢⅛ teaspoon Vanilla extract
- ▢A pinch of pumpkin spice, optional
Instructions
- Preheat your waffle iron and lightly grease it with oil or nonstick spray.
- In a large mixing bowl, whisk together the eggs, Greek yogurt, milk, melted coconut oil, and vanilla until smooth.
- Add almond flour, coconut sugar, baking powder, baking soda, salt, pumpkin pie spice, and optional cinnamon on top of the wet mixture.
- Gently mix until just combined. The batter will be thick; however, if too thick, add a splash more milk.
- Scoop batter into the preheated waffle iron, but don’t overfill it.
- Cook until golden brown and crisp, about 4–5 minutes depending on your waffle maker.
- For the optional Greek yogurt “icing,” mix ½ cup Greek yogurt with 1 tablespoon honey, ⅛ teaspoon vanilla extract, and optional pumpkin spice.
- Serve waffles warm, with a dollop of the yogurt icing on top, and optionally with berries, maple syrup, or nut butter.
High Protein Chocolate Pudding
If you’re craving a rich, chocolatey dessert that doubles as a healthy snack or post-workout fuel, this High Protein Chocolate Pudding is for you. It’s silky, satisfying, and naturally sweetened, made with simple ingredients like Greek yogurt and boiled egg whites. This high-protein chocolate pudding is a quick, 5-minute recipe that turns wholesome ingredients into a rich, chocolatey treat. With no protein powder and no complicated steps, it’s a nutritious way to fuel your body while satisfying your sweet tooth.
This creamy, velvety pudding is packed with natural protein — Greek yogurt adds creaminess, cacao powder brings deep chocolate flavor, and boiled egg whites give it a smooth texture and a nourishing boost.
What makes this recipe even better is how well it fits into meal prep. Having a ready-to-eat, protein-rich dessert in your fridge means you can reach for something wholesome instead of processed snacks when cravings hit. It’s quick to portion, stores beautifully for several days, and saves you time during busy weeks. Whether you enjoy it as a pre- or post-workout snack, a midday pick-me-up, or a healthy after-dinner indulgence, this pudding keeps you satisfied, energized, and right on track with your goals.

High Protein Chocolate Pudding
Ingredients
- 1 cup Plain Greek yogurt
- 2 tablespoons Unsweetened cacao powder
- 3 Boiled egg whites
- 1 teaspoon Pure vanilla extract
- 1½ tablespoons Pure maple syrup, or honey, adjust to taste
Instructions
- Add all ingredients to a small hand blender cup or mini blender (such as an immersion or bullet-style blender). Blend on high until smooth and creamy, about 30–45 seconds.
- Taste and add a touch more maple syrup or honey if you prefer a sweeter taste.
- Pour the pudding into a jar or bowl, cover it, and refrigerate for at least 30 minutes to allow the pudding to thicken up and develop flavor.
- Serve the pudding as-is, or top with cacao nibs, banana slices, berries, or a sprinkle of sea salt for an extra treat.