This post may contain affiliate links. Please read our disclosure policy.
We use dough for such a wide variety of recipes, making it essential in the kitchen! From dishes to desserts, we need to know How To Perfectly Knead Your Dough, to keep creating our delicious recipes with little effort.
Kneading dough can be one of the most enjoyable steps during the baking process, but can be scary for some beginners.
Kneading Dough Is The Best Part

Kneading dough is a process of steps, and with time, it becomes the easiest part in putting a recipe together. All you need is your dough, a bit of flour, your hands, and you’re good to go!
Kneading creates the structure and strength in the dough, giving it the soft, squashy texture it needs to create the best recipe outcome. Once the dough ingredients are mixed, the structure allows gases to be trapped inside, which is what causes the dough to rise.
Check out the tips, tricks and steps needed on How To Perfectly Knead Your Dough, and get ready to make bread in a new way!
Step By Step For Kneading Your Dough
Theres a couple of steps to do when kneading our dough, but altogether, takes only a few minutes. With time, the process becomes simpler and the steps become easier.
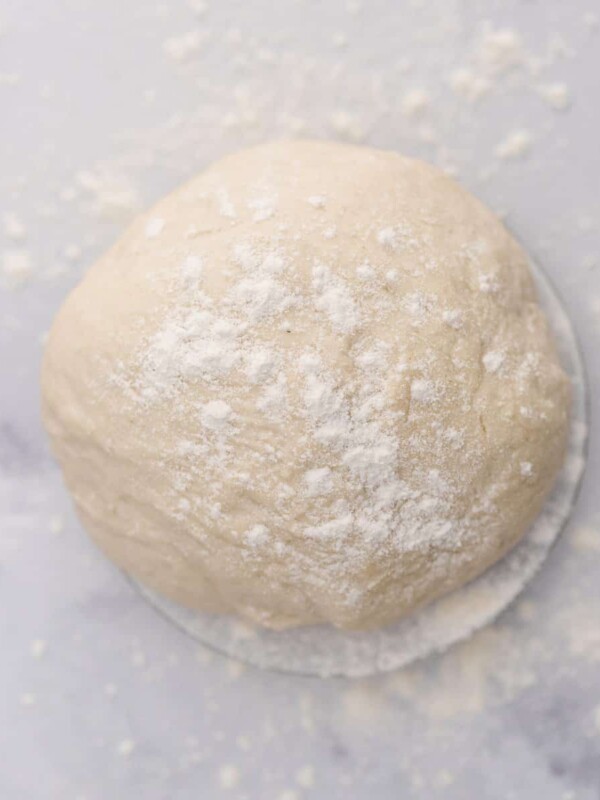
Step 1 – Preparing your surface
The first thing we need to do is prepare the tabletop where we will be kneading. Give yourself enough space to extend your arms back and forth while kneading, without any added strain.
Sprinkle the tabletop with flour and place your dough, ready to begin kneading.
Step 2 – Using the heels of your hands
Now to begin kneading. Push down into the dough with the heel of your hand, and then outwards, stretching the dough out slightly each time. Do this again and again, only using the heel of your hand.
Step 3 – Turning the dough
As you push down and out, turn the dough slightly, at roughly 45 degrees between each knead. Continue to knead, fold and turn the dough until the texture becomes smooth.
Step 4 – Adding more flour
If you feel the dough is starting to get a little sticky, add a little more flour while kneading.
It’s Time To Knead Away

Tips and Tricks To Perfectly Knead Your Dough
The process of How To Perfectly Knead Your Dough can be quite messy, because of the folding and turning, and occassionally adding more flour. It might help to wear an apron or stay in your pj’s, to not get your fancy clothes messy.
Kneading is simply repeating the same pushing step over and over, with a few turns in between, until you reach a smooth doughy texture. With time, it gets much easier.
If the dough gets sticky, add a little more flour to help. But be careful not to add too much, as it may make your bread a little crumbly and we don’t want that. You can leave the dough to rest for a few minutes, making it a little easier to handle and enough time to absorb the water.
The Poke Test – section a small ball of dough and poke it with your finger. If the indent fills back up quickly, you’re done kneading. If not, and the indent stays, then keep needing a little more.
The Difference Between A Mixer Or By Hand?
You can Perfectly Knead Your Dough by either using a mixer designed specifically for kneading, or use your hands. Ofcourse, a mixer tends to be much quicker, but using your hands makes you more in control of your dough.
Kneading dough can get a little messy and with a wet dough texture, and adding a little more flour, you may compromise on its texture. A mixer skips the mess and does the hard work for you.
However, by hand, you will notice a visable difference difference in the texture of your dough! And it is nearly impossible to overknead, making your bread too crumbly or dense.
Knead, Knead, And Knead Again

How To Perfectly Knead Your Dough Techniques
Kneading is actually the same simple process being repeated over and over until the dough tells you it’s done! There are different types of How To Perfectly Knead Your Dough techniques, it all depends on how you push or pull. But the repetition stays the same.
The French Fold
With the french fold, its a little different from the normal technique of pushing inwards and outwards. You will need to place your fingers under the dough, thumbs on top of the dough and grab one side of the dough with both hands.
Stretch and fold the side of the dough in your hands over the dough on the tabletop, and repeat for 15 to 30 minutes, rotating in the same direction every time. Pick up the dough and rotate it 90 degrees in one motion.
As you rotate it, slap the dough back down gently on the tabletop but only half sticks on the counter and the other half still in your hands.
Stretch and fold again and eventually, you will get a smooth and fully kneaded dough.
The Stretch and Fold
With your dough sitting on your tabletop, use one hand to hold down the side of the dough that is closest to you. With your other hand, grab the other side of the dough and stretch it away from you.
Fold it over the dough you were holding down. Rotate 90 degrees and repeat the process many times for 10 to 30 minutes until the dough becomes becomes and full kneaded.
Frequently Asked Questions (FAQs)
To start off, keep kneading until the texture becomes smooth and supple. Then do the poke test to confirm your dough is good to go.
To begin with, yes! Dough should be sticky and quite wet but as you start kneading and the dough has enough time to absorb the water, it will become less sticky.
Over-kneaded dough tends to be dense and dry on the inside. The dough will be more crumbly and more rock hard once made into bread.
Kneading requires your hands, pushing downwards and outwards into the dough. You need a table top with enough space to do this and where you are not knealing over too much.