This post may contain affiliate links. Please read our disclosure policy.
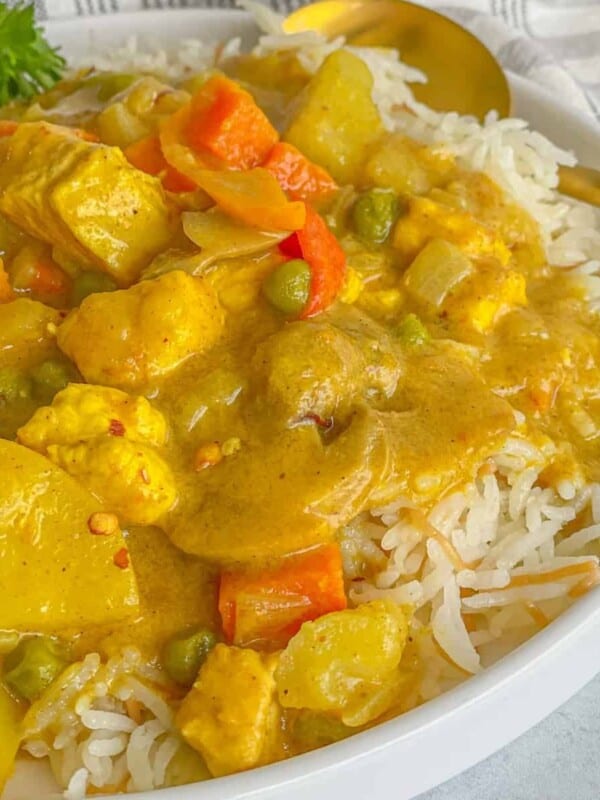
Think butter chicken is too tricky to make at home? Think again! This Instant Pot Butter Chicken recipe serves tender chicken in a rich, creamy tomato sauce with bold spices — all ready in under an hour. Perfect for weeknight dinners, meal prep, or when you want restaurant-quality Indian food without the hassle.
I’ve tried many butter chicken versions—slow simmering, stovetop, oven-baked—but nothing beats using the Instant Pot for that tension-free flavor infusion. Once I started making butter chicken this way, especially with the option of using coconut milk or cream, it became a go-to.

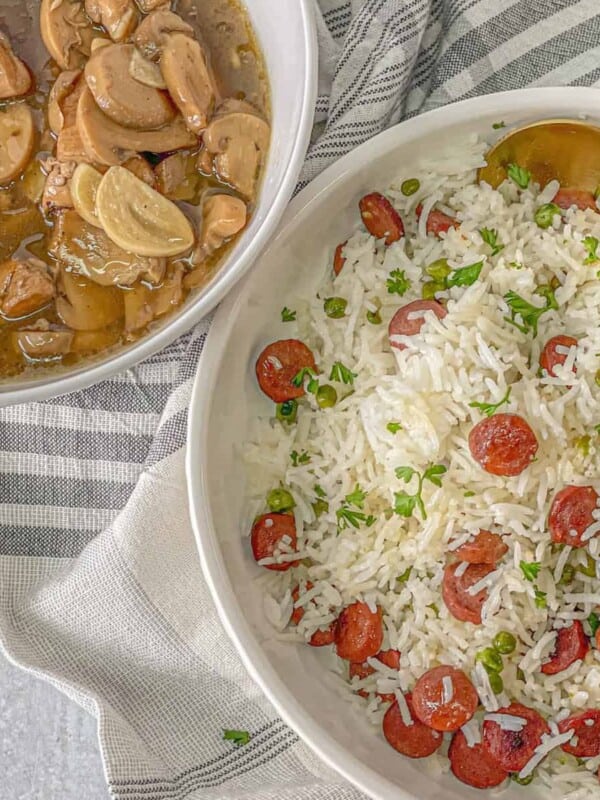
Ever since I started making this Instant Pot Butter Chicken, it’s become a regular in my meal-prep rotation — quick, comforting, and packed with flavor. I usually serve it with basmati rice or shell pasta; I prefer the rice for its fluffiness, while my girls can’t get enough of the pasta! If you love bold, creamy curries like this, you’ll also enjoy my Creamy Coconut Curry Chicken, Creamy Chickpea Curry Stew, and Garam Masala Chicken in Creamy Mushroom Sauce recipes.
Each one is perfect for prepping ahead: cook a big batch, portion it into containers, and you’ve got flavorful, restaurant-quality lunches or dinners ready for the week. It’s such a satisfying way to make healthy, hearty meals stress-free and delicious.
Recipe Overview
- Flavor Profile: Creamy, tangy, mildly spiced, buttery with a tomato base
- Cooking Method: Sauté aromatics, then pressure cook chicken in sauce, finish by simmering with cream or coconut milk
- Skill Level: Moderate — uses Instant Pot but accessible for beginners
- Occasion: Dinner, meal prep, family meals, weeknight favorite
- Dietary Notes: Can be made dairy-free (using coconut milk), gluten-free, richly satisfying

Ingredients
For the Butter Chicken
- Boneless, skinless chicken thighs or breasts, cut into bite-size pieces
- Onions, finely chopped
- Garlic cloves, minced
- Fresh ginger, grated
- Plain full-fat yogurt
- Lemon juice
- Tomato sauce
- Garam masala
- Ground cumin
- Paprika
- Turmeric
- Kashmiri chili powder
- Chili powder
- Salt
- Black pepper
- Sugar or honey (optional)
- Butter or olive oil
- Kasuri methi (crushed dried fenugreek leaves)
Cream / Coconut Option
- Heavy cream or
- Substitutions: unsweetened coconut milk (dairy-free) or mix 1½ cups cream + 1½ cups coconut milk
To Serve
- Fresh cilantro, chopped
- Cooked basmati rice or pasta shells

Ingredient Spotlight: The Creamy Sauce
The real magic of butter chicken lies in its irresistibly creamy sauce — a luxurious blend of tangy tomato, warm Indian spices, and either rich cream or smooth coconut milk. The tomato base provides a subtle brightness that balances perfectly with the mellow sweetness of the cream, creating a sauce that’s both comforting and deeply flavorful.
Garam masala, cumin, paprika, and turmeric come together in harmony, layering the dish with aromatic warmth and depth. Adding the cream (or coconut milk) after pressure cooking allows the sauce to thicken gently without curdling, resulting in a silky finish that coats every tender piece of chicken. It’s this luscious sauce that transforms a simple home-cooked meal into something that feels restaurant-worthy — comforting, aromatic, and completely craveable.
Step-by-Step Instructions
Mix chicken, yogurt, lemon juice, 1 teaspoon garam masala, and a pinch of salt. Let it sit at least 30 minutes (or overnight).
Set the Instant Pot to sauté. Add butter or olive oil. Now, add chopped onions, garlic, and ginger and cook until softened and fragrant, about 3–5 minutes.
Add the marinated chicken and cook for 2–3 minutes, just until the outside starts to turn white.
Add remaining garam masala, cumin, paprika, turmeric, Kashmiri chili powder, salt, and pepper. Cook for 1 minute.
Pour in tomato sauce. Add heavy cream or coconut milk. Add sugar or honey if using. Stir well.
Cancel Sauté mode. Seal lid and cook on High Pressure for 10 minutes. Let pressure naturally release for 10 minutes, then quickly release remaining steam.
Open the lid. Stir in crushed kasuri methi and 1 tablespoon butter (optional but recommended). Let sit 3–5minutes before serving.
Serve over cooked pasta shells or cooked basmati rice and garnish with fresh chopped cilantro. When serving, on your plate or bowl, drizzle a little heavy cream or coconut milk on top for presentation.


Serving Suggestions & Pairings
- Serve it with fluffy basmati rice or warm naan bread to soak up every drop of that creamy sauce.
- Try it with shell pasta — the little shells hold onto the sauce perfectly for a comforting twist.
- Add a side of roasted vegetables like cauliflower, zucchini, or eggplant for a complete meal.
- Pair it with a cool cucumber raita (made with yogurt, cucumber, and mint) to balance the spices.
- Got leftovers? Use the sauce in wraps or grain bowls — it tastes even better the next day!
Storage & Meal Prep Tips
- Store leftovers in airtight containers for up to 4–5 days in the fridge
- Freeze in portioned jars for up to 2 months (thaw gently and simmer to recombine)
- For meal prep: cook rice separately and package chicken + sauce; add cilantro fresh before serving
- Let the sauce rest for a while before serving—flavors meld and deepen

Pro Tips
I always make sure to deglaze the pot after adding the tomato sauce and spices — it keeps the bottom from catching and saves me from that dreaded “Burn” warning.
Never add the cream before pressure cooking — trust me, it can split and ruin the texture. Stir it in afterward for that silky, smooth sauce we all love.
When it comes to spice, I like to start mild with chili powder and adjust as I go. It’s easier to build heat than to tone it down later!
A good garam masala makes all the difference — fresh, aromatic spices really bring out that restaurant-quality flavor.
If the sauce feels a bit thin, I just let it simmer a few extra minutes or whisk in a touch of cornstarch slurry to thicken it up.
Frequently Asked Questions (FAQs)
Yes — swap in unsweetened coconut milk or a blend of cream + coconut milk. The flavor remains rich and comforting.
Yes — swap in unsweetened coconut milk or a blend of cream + coconut milk. The flavor remains rich and comforting.
It’s flavorful and mildly spicy. Adjust the chili powder or skip it entirely if you prefer a gentler heat.
Yes — you can use the pot-in-pot method (place a bowl of rice above the chicken) if your model allows it, but monitor your liquid so the chicken sauce doesn’t burn.

More Recipes You Must Try


Instant Pot Butter Chicken
Equipment
Ingredients
Butter Chicken Ingredients
- 3 Pounds Boneless, skinless chicken thighs or breasts, cut into bite-sized pieces
- 2 Medium onions, finely chopped or cubed
- 6 Garlic cloves, minced
- 2-Inch piece Fresh ginger, grated
- ½ cup Plain full-fat yogurt
- 1 tablespoon Lemon juice
- 2 14-ounce cans Tomato sauce
- 4 teaspoons Garam masala
- 2 teaspoons Ground cumin
- 2 teaspoons Paprika
- 1 teaspoon Turmeric powder
- 1 teaspoon Kashmiri chili powder, swap for regular chili powder if unavailable
- 1 teaspoon Chili powder, (adjust to taste)
- 1½ teaspoons Salt
- ⅛ teaspoon Black pepper
- 1 teaspoon Sugar or honey, (optional, to balance acidity)
- 3 cups Heavy cream, Healthier Option: Substitute all 3 cups with unsweetened coconut milk for a lighter, dairy-free version.
Balanced Option: Use 1½ cups heavy cream + 1½ cups coconut milk for a creamy yet lighter flavor.
- 6 tablespoons Butter or olive oil
- 1 teaspoon Kasuri methi, crushed dried fenugreek leaves
- Fresh cilantro, chopped (for garnish)
- 4 cups Cooked pasta shells
Basmati Rice Ingredients
- 2 cups Basmati rice
- 3 cups water
- 1½ tablespoons Olive oil or butter
- ½ teaspoon Salt, (optional, to taste)
Instructions
- Mix chicken, yogurt, lemon juice, 1 teaspoon garam masala, and a pinch of salt. Let it sit at least 30 minutes (or overnight).
- Set the Instant Pot to sauté. Add butter or olive oil. Add chopped onions, garlic, and ginger and cook until softened and fragrant, about 3–5 minutes.
- Add the marinated chicken and cook for 2–3 minutes, just until the outside starts to turn white.
- Add remaining garam masala, cumin, paprika, turmeric, Kashmiri chili powder, salt, and pepper. Cook for 1 minute.
- Pour in tomato sauce. Add heavy cream or coconut milk. Add sugar or honey if using. Stir well.
- Cancel Sauté mode. Seal lid and cook on High Pressure for 10 minutes. Let pressure naturally release for 10 minutes, then quickly release remaining steam.
- Open the lid. Stir in crushed kasuri methi and 1 tablespoon butter (optional but recommended). Let sit 3–5minutes before serving.
- Serve over cooked pasta shells or cooked basmati rice and garnish with fresh chopped cilantro. When serving, on your plate or bowl, drizzle a little heavy cream or coconut milk on top for presentation.
How to Make Basmati Rice
- Place the rinsed rice in a bowl, cover with warm water, and let it sit for 10 minutes. Drain well.
- In a medium pot, heat olive oil or butter over medium heat. Add the drained rice and sauté for 2–3 minutes, stirring often until lightly fragrant.
- Pour in 3 cups of water and add salt. Stir once to combine.
- Bring to a boil over medium-high heat. Once boiling, cover tightly, reduce heat to low, and simmer for 12–15 minutes, until all water is absorbed.
- Turn off the heat. Let the rice sit covered for 5–10 minutes, then fluff gently with a fork before serving.
Notes
- I always make sure to deglaze the pot after adding the tomato sauce and spices — it keeps the bottom from catching and saves me from that dreaded “Burn” warning.
- Never add the cream before pressure cooking — trust me, it can split and ruin the texture. Stir it in afterward for that silky, smooth sauce we all love.
- When it comes to spice, I like to start mild with chili powder and adjust as I go. It’s easier to build heat than to tone it down later!
- A good garam masala makes all the difference — fresh, aromatic spices really bring out that restaurant-quality flavor.
- If the sauce feels a bit thin, I just let it simmer a few extra minutes or whisk in a touch of cornstarch slurry to thicken it up.

Delicious and simple to make
Hi Har, so happy to hear your feedback! Thank you!! 🙂