This post may contain affiliate links. Please read our disclosure policy.
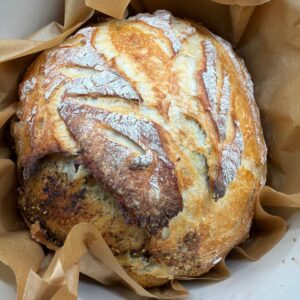
There is something magical about pulling a freshly baked loaf of sourdough bread from the oven. The crackling crust, the warm aroma, and the beautiful artisan look make it feel like something straight from a bakery. Yet with the right method, making sourdough at home can be surprisingly simple.

This easy overnight artisan sourdough bread is designed for home bakers who want bakery-quality results without complicated schedules or advanced techniques. A few simple stretch-and-folds and an overnight rest in the refrigerator create incredible flavor, structure, and texture with very little hands-on work.
I love this recipe because it is forgiving and flexible, and it consistently produces a beautiful loaf. Whether you’re making your first sourdough loaf or your fiftieth, this recipe delivers a crisp, golden crust, a soft, airy crumb, and the classic tangy flavor that makes homemade sourdough so special. I also recommend trying 3 Ingredient Cloud Bread, Double Chocolate Banana Bread, and Gluten-Free Zaatar Flat Bread (No Yeast).
Table of Contents
- What Is Artisan Sourdough Bread?
- Recipe Overview
- Why You’ll Love This Recipe
- Ingredient Notes
- Substitutions and Variations
- How to Feed and Prepare Your Sourdough Starter
- How to Make Artisan Sourdough Bread
- Recipe Tips
- Baker’s Notes
- What to Serve with Sourdough Bread
- Storage Tips
- Frequently Asked Questions
- More Bread Recipes You’ll Love
- Easy Overnight Artisan Sourdough Bread Recipe
What Is Artisan Sourdough Bread?
Artisan sourdough bread is a naturally leavened bread made with an active sourdough starter instead of commercial yeast. The starter contains wild yeast and beneficial bacteria that ferment the dough, creating its signature flavor.
This overnight version uses a long, cold fermentation in the refrigerator to develop flavor while simplifying the baking process. The slow fermentation improves texture, creates a more complex taste, and makes the dough easier to shape and score. The result is a loaf with a crisp crust, chewy crumb, and complex flavor that simply can’t be replicated with quick-rise breads.
Artisan sourdough is commonly enjoyed for breakfast, sandwiches, soups, charcuterie boards, or simply toasted with butter. Its crisp crust and chewy interior make it one of the most beloved homemade breads in the world.
Recipe Overview
Flavor Profile: Mildly tangy, deeply savory, and slightly nutty with the signature complexity of natural sourdough fermentation
Texture: Crisp, golden artisan crust with a soft, airy, chewy crumb and beautiful open pockets throughout
Method: A simple overnight sourdough method with stretch-and-folds, cold fermentation, and Dutch oven baking
Skill Level: Beginner-friendly sourdough recipe with flexible timing and forgiving techniques
Occasion: Perfect for everyday sandwiches, toast, soup pairings, charcuterie boards, and homemade artisan bread lovers

Why You’ll Love This Recipe
- Perfect beginner sourdough recipe with simple instructions
- Develops incredible flavor through overnight cold fermentation
- Requires very little hands-on work
- Creates a crisp bakery-style crust and airy crumb
- Flexible timing fits into busy schedules
- Uses only four basic ingredients
- No stand mixer required
- Perfect for sandwiches, toast, soups, and entertaining
Ingredient Notes
Bread Flour: Higher protein content creates stronger gluten development, better oven spring, and a taller loaf.
Water: Hydrates the flour and activates fermentation. Room-temperature filtered water works best.
Active Sourdough Starter: The heart of every sourdough loaf. Your starter should be bubbly, active, and doubled in size before mixing the dough.
Salt: Enhances flavor and strengthens gluten structure during fermentation.

Substitutions and Variations
All-Purpose Flour: It is a great alternative that still produces excellent results with a slightly softer texture.
Whole Wheat Version: Replace up to 20% of the flour with whole wheat flour for additional flavor and nutrition.
Longer Fermentation: Cold ferment for up to 48 hours to develop a tangier sourdough flavor.
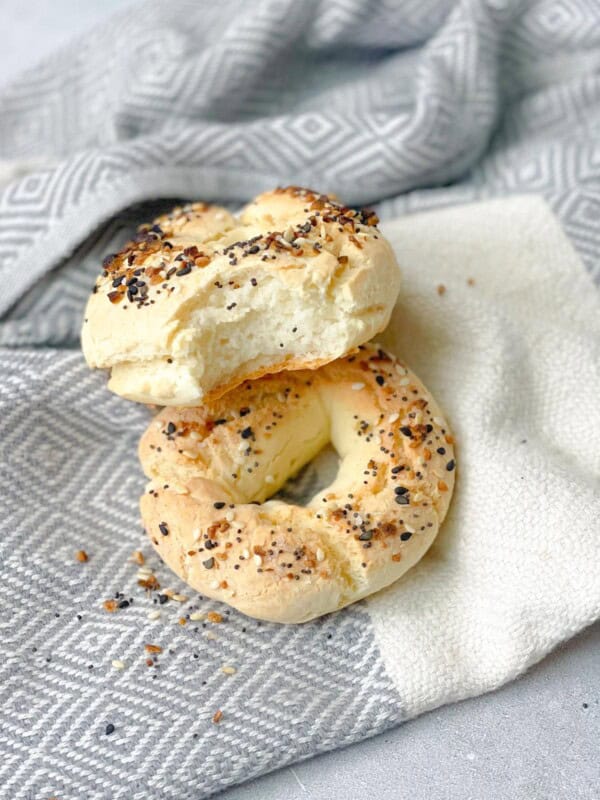
Seeded Sourdough: Add sesame seeds, sunflower seeds, flaxseeds, or pumpkin seeds for extra texture.
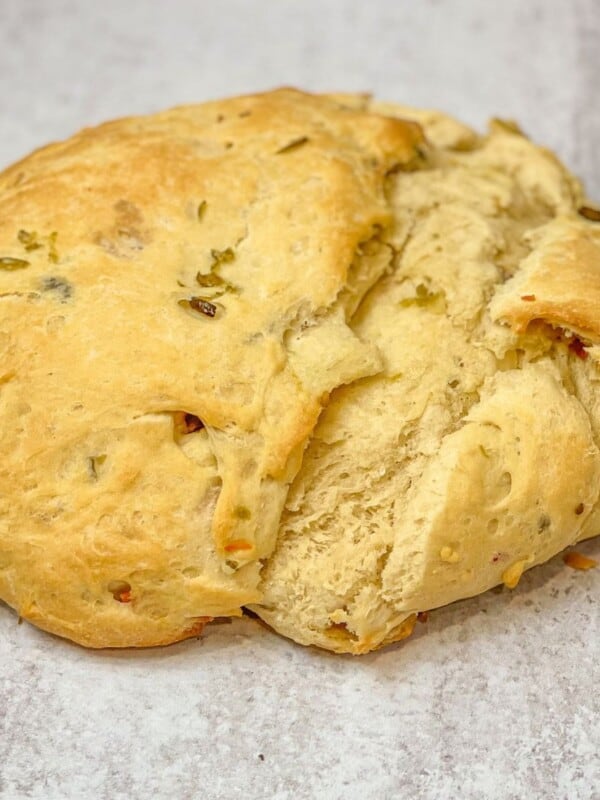
Rosemary Sourdough: Mix fresh rosemary into the dough before bulk fermentation.
Olive Oil Enriched Dough: Add the optional olive oil for a slightly softer crumb.
How to Feed and Prepare Your Sourdough Starter
Before making this bread, make sure your sourdough starter is active, bubbly, and at its peak. If your starter is stored in the refrigerator, remove it and let it sit at room temperature for about 4 hours before feeding.
To feed it, place a bowl on a kitchen scale and press “tare” or “zero.” Measure 50 grams of starter in a bowl, then add 50 grams of water and 50 grams of flour. Stir until fully combined.
Let the mixture rest at room temperature until it doubles in size and is full of bubbles, which typically takes 4–8 hours depending on your kitchen temperature.
Once the starter is active and doubled, measure out the 130 grams needed for this recipe. Feed any remaining starter and return it to the refrigerator for future baking.
A strong, active starter is one of the most important factors in achieving a beautifully risen sourdough loaf.
How to Make Artisan Sourdough Bread
In a large bowl, combine the sourdough starter and water.
Add the flour and salt. Mix until no dry flour remains and a shaggy dough forms.
Cover the bowl and let the dough rest at room temperature for about 4 hours.
During the 4-hour resting period, perform 1–4 sets of stretches and folds. Wet your hands, stretch one side of the dough up, and fold it over itself. Rotate the bowl and repeat on all four sides. Space the stretch-and-folds about 30 minutes apart if performing multiple sets.
Once the resting period is complete, refrigerate the dough for 12–24 hours.
When ready to bake, place a Dutch oven or cast-iron pot in the oven and preheat to 550°F.
Remove the dough from the refrigerator and gently turn it onto a lightly floured surface.
Shape the dough into a round loaf by folding the outer edges toward the center and rotating it to create surface tension.
Place the dough onto a piece of parchment paper. Lightly dust the top with flour and score with a sharp knife or bread lame.
Carefully transfer the dough into the hot Dutch oven using the parchment paper. Place a shallow pan of water on the bottom oven rack if desired.
Cover with the lid and reduce the oven temperature to 450°F.
Bake covered for 30 minutes.
Remove the lid and bake for an additional 10–15 minutes, or until deeply golden brown.
Remove from the oven and transfer to a cooling rack.
Cool for at least 20–40 minutes before slicing.

Recipe Tips
A strong sourdough starter is the key to a tall, well-risen loaf. Feed your starter and wait until it has doubled in size and is full of bubbles before using it.
Use a digital kitchen scale whenever possible. Measuring ingredients by weight produces more consistent and reliable sourdough results than measuring cups.
The dough should feel soft and slightly sticky. Resist the urge to add more flour, as this can create a dense loaf. Wet your hands during stretch-and-folds if the dough feels sticky.
Stretch-and-folds strengthen the dough and help create a taller loaf with an airy crumb. For the best results, perform multiple stretch-and-fold sessions during the resting period.
Handle the dough gently during shaping to preserve the air bubbles. Gently rotate and tuck it underneath itself to create surface tension for a taller loaf, then lightly dust the top with flour before scoring for a beautiful artisan-style finish.
A sharp knife or bread lame creates clean scores and allows the bread to expand properly during baking, and prevents random cracks.
Preheat your Dutch oven thoroughly to create excellent oven spring and develop a crisp artisan crust.
Allow the loaf to cool for at least 20–40 minutes before slicing. Cutting too early can result in a gummy texture.
For an extra bakery-style crust, place a pan of water on the bottom oven rack to create additional steam, which can help the bread rise higher and develop a thinner, crispier crust.

Baker’s Notes
During the 4-hour counter rest, the dough will begin developing strength and flavor. Don’t worry if it doesn’t double in size.
If you’re short on time, I’ve successfully made this bread by letting the dough rest on the counter for just 2 hours and performing only one stretch-and-fold before refrigerating overnight.
Refrigerating the dough overnight slows fermentation, develops flavor, and makes shaping easier. For a tangier loaf, refrigerate for up to 48 hours.
Bake the dough straight from the refrigerator. Cold dough is easier to shape and score. There is no need to bring it to room temperature before baking.
Cover the dough well when refrigerating to prevent it from drying out. A bowl with a lid or a towel-covered bowl both work well. Proofing basket is completely optional; a large bowl works perfectly for this artisan sourdough bread recipe.
If you skip this step, don’t worry because the Dutch oven naturally traps steam and will still produce a beautiful loaf.
Every kitchen is different. Warmer kitchens ferment dough faster, while cooler kitchens may require additional time.
If your loaf spreads slightly while shaping, don’t panic. It will often spring up beautifully once it hits the hot Dutch oven.
Don’t overthink sourdough. If your starter is bubbly, your dough has had time to ferment, and your oven is hot, you’re already on your way to a beautiful loaf.
What to Serve with Sourdough Bread
- Butter, jam, or honey: Spread it with blueberry chia jam or strawberry chia jam.
- Homemade soups and stews: Click on soups to discover warm pairings.
- Charcuterie and cheese Board
- Avocado toast
- Sandwiches and paninis, like Zaatar and Grilled Cheese Sandwich with Fried Eggs
- Olive oil and balsamic vinegar dipping plates

Storage Tips
Room Temperature: Store in a bread box, paper bag, or wrapped in a clean kitchen towel for up to 4 days. Avoid refrigerating baked artisan sourdough bread, as it can dry out faster.
Freezer: Freeze whole or sliced bread for up to 3 months.
Reheating: Warm slices in a toaster or bake the loaf at 350°F for 8–10 minutes to refresh the crust.
Frequently Asked Questions
A ready starter should be bubbly, active, and roughly doubled in size after feeding.
The most common cause is an inactive starter. A weak starter will not produce enough fermentation to properly lift the dough.
Yes. Bread flour generally creates a stronger dough and taller loaf, but all-purpose flour works very well.
Yes. The dough can be refrigerated for up to 48 hours, which often develops a more complex sourdough flavor.
Sourdough dough is naturally wetter than many traditional bread doughs. Lightly wetting your hands makes it much easier to handle.
Excessive fermentation can weaken gluten and cause a flat loaf with poor oven spring.
No. A proofing basket is helpful but not required. A large bowl works perfectly for this recipe.
A Dutch oven is highly recommended because it traps steam and helps create the best rise and crust.
A sharp knife or razor blade works just as well for scoring the dough.
Absolutely. Simply double all ingredients and use a larger bowl for mixing and fermenting the dough.
More Bread Recipes You’ll Love


Easy Overnight Artisan Sourdough Bread
Ingredients
- 650 grams Bread flour, or organic All-purpose flour
- 450 grams Warm water
- 160 grams Active sourdough starter
- 15 grams Salt
Instructions
- In a large bowl, combine the sourdough starter and water.
- Add the flour and salt. Mix until no dry flour remains and a shaggy,sticky dough forms.
- Cover the bowl with a kitchen towel and let the dough rest at room temperature for about 4 hours, or until it has risen well.
- After 2 hours of the resting period, perform 1–4 sets of stretches and folds. Stretch one side of the dough up, and fold it over itself. Rotate the bowl and repeat on all four sides. Space the stretch-and-folds about 30 minutes apart if performing multiple sets.
- Once the resting period is complete, refrigerate the dough for 12–24 hours (and up to 48 hours). The longer, the more sour your bread will be. Cover the dough with a clean tea towel that has been thoroughly dampened and wrung out to prevent the surface from drying out
- When ready to bake, place a Dutch oven or cast-iron pot in the oven and preheat to 550°F.
- Remove the dough from the refrigerator and gently turn it onto a lightly floured surface.
- Shape the dough into around loaf by folding the outer edges toward the center and rotating it to create surface tension.
- Place the dough onto a piece of parchment paper. Lightly dust the top with flour and score with a sharp knife or bread lame.
- Carefully transfer the dough into the hot Dutch oven using the parchment paper. Place a shallow pan of water on the bottom oven rack if desired.
- Cover with the lid and reduce the oven temperature to 450°F.
- Bake covered for 30 minutes.
- Remove the lid and bake for an additional 15 minutes, or until deeply golden brown.
- Remove from the oven and transfer to a cooling rack.
- Cool for at least 40 minutes before slicing.
Notes
- A strong sourdough starter is the key to a tall, well-risen loaf. Feed your starter and wait until it has doubled in size and is full of bubbles before using it.
- Use a digital kitchen scale whenever possible. Measuring ingredients by weight produces more consistent and reliable sourdough results than measuring cups.
- The dough should feel soft and slightly sticky. Resist the urge to add more flour, as this can create a dense loaf. Wet your hands during stretch-and-folds if the dough feels sticky.
- Stretch-and-folds strengthen the dough and help create a taller loaf with an airy crumb. For the best results, perform multiple stretch-and-fold sessions during the resting period.
- Handle the dough gently during shaping to preserve the air bubbles. Gently rotate and tuck it underneath itself to create surface tension for a taller loaf, then lightly dust the top with flour before scoring for a beautiful artisan-style finish.
- A sharp knife or bread lame creates clean scores and allows the bread to expand properly during baking, and prevents random cracks.
- Preheat your Dutch oven thoroughly to create excellent oven spring and develop a crisp artisan crust.
- Allow the loaf to cool for at least 40 minutes before slicing. Cutting too early can result in a gummy texture.
- For an extra bakery-style crust, place a pan of water on the bottom oven rack to create additional steam, which can help the bread rise higher and develop a thinner, crispier crust.